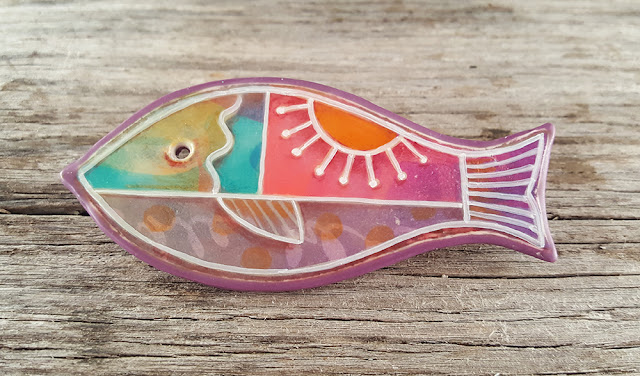
I created my own designs for the transfers with shapes I had drawn and scanned then arranged in Illustrator. After that I layered, colored, sliced and diced in Photoshop.
Layer 1 -- toner transfers. My transfers came out a little patchy but it won't matter for this purpose.
Layer 2 -- I put a thin layer of liquid clay over the transfer and cured it before using oil-paint pens to draw lines. The layer of clay is critical to keeping your pens in working order. If you draw directly on the transfer layer, the slight bit of tackiness of the transfer seems to gum up the works.
The "extra fine" point Sharpie pens make the nicest lines. I also tried the relatively cheap CraftSmart brand at Michael's and a more expensive Sakura pen but the Sharpies work well and don't remain gummy after I do the final spray of PYMII. The CraftSmart pens stayed a little tacky so I don't recommend for this purpose but they could be pretty decent for other uses.
The pic of the four pieces were done with the Extra Fine point; the fish was done with the Fine Point which is actually fairly thick).
I put a thin layer of liquid clay over the ink lines once they were dry and cured the pieces.
Layer 3 -- I started shading with colored pencils but they didn't like the liquid clay surface. So I pulled out my favorite ballpoint pens, Ink Joy by PaperMate, and started shading. I shaded as though light was coming from above to give the pieces a bit of 3D effect. After coloring I put another layer of liquid clay on the surface and cured it.
I discovered the purple pen bleeds. I had to touch up the white lines on the tall skinny spike before going further. The orange pen bleeds a bit also so I touched it up too.
Layer 4 -- I glued a clutch pin back on the back of each piece. I covered the backs with a full sheet of a coordinating color that I wrapped around the edges and trimmed flush. I covered the front surface with another layer of liquid clay before curing. The last liquid faded the white somewhat so I revived it with a white pen. When the piece was dry, I gave it a spray of PYMII to protect the last white lines.


Amazing, just amazing!
ReplyDeleteBeautiful!
ReplyDeleteReally gorgeous!
ReplyDeleteWhat a really cool process! Very neat how you built up layers and layers. It gives the pieces a batik/stained glass hybrid feel! Great job!
ReplyDelete