Here's how I made these...
...from these leftover 1" tall cane slices:
1) I placed a few slices of cane on a sheet of lime colored clay that was about 3 times as thick as the cane slices. Then I ran the sheet through the pasta machine on successively thinner settings (from 1 to 4-5).
2) I alternated the direction I fed the clay through so the cane would stretch in both directions. The cane clay was more leached than the underlayer so the the cane cracked a bit as it stretched, letting the green underneath show through.
3) I rolled a log of scrap clay, sliced it into equal portions, and rolled each piece into a ball.
4) I ripped the cane sheet into random pieces and wrapped them randomly around the ball, covering it completely. I rolled the ball until all the wrapped pieces had melded together. I turned two of the balls into long barrel shapes.
5) With my needle tool I traced lines to loosely define shapes of leaves and petals.
6) I baked the beads for 15 minutes and then lightly sanded with 1000 grit wet-dry sandpaper.
7) I rubbed black liquid clay into the etched lines and wiped off the excess with a paper towel.
Then the beads went back into the oven for 15 more minutes.
8) I sanded them again with 1000 grit. I could have stopped at this point but I like them shiny so I used my buffer.
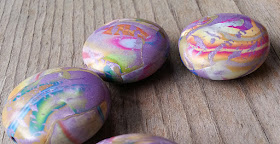
The cane slices on the beads below were put on a lilac base layer. I didn't etch these beads. I wish I would have, the design would have looked more "focused."
So, there you go. Grab some of those old canes and blow 'em up!


I blend rather than cane but I do like what you have done with the canes especially the ones at the top very art deco!
ReplyDeleteJackie
This is a great post. You turned the very structured kaleidoscope cane slices into a style that is uniquely yours.
ReplyDelete