Other stuff I do...

Sunday, November 12, 2017

Tutorial: Chalkboard Beads


I received a request for a tutorial on these beads. 

The most critical part of this process is having the right kind of stamp. I designed the stamps because I couldn't find any like what I needed. 

The difference: the negative space of the stamp design needs to be the "solid" portion in your artwork so that it will end up as the raised part on the stamp -- the part that makes the impression. In other words, these stamps are set up in reverse of how most stamps are created. 

The stamps look like this:


The artwork that I had turned into stamps looked like this:


I like the design element to extend into the border area so each element breaks the edge of the frame. 


How to Make the Beads

  1. Roll a sheet of black and impress two stamps. 
  2. Cut each one out leaving an equal amount of space around the edges of the impression that is wider than the border you eventually want to have on the bead.
  3. Cut a third rectangle of clay that is the same size as the two impressed pieces. 
  4. Cut a strip out of that third piece to leave a channel for the stringing cord. (After cutting out the cord channel, the third piece is now actually two separate pieces of clay.)
  5. Place one of the impressed pieces face down on your baking cardboard making note of the "top" edge, if that matters in your design. 
  6. Lay the two channel pieces on top of the impressed piece leaving a channel where you want your stringing cord to run. 
  7. Place the second impressed piece face up on the stack, making sure the "top" of this piece is aligned with the top of the face down piece. 
  8. Gently pat to ensure that the layers are adhered to each other.
  9. Trim all four edges of the bead to make the stack even and smooth on all sides. 
  10. Your channel hole may disappear momentarily, but gently insert an awl or skewer to open the hole and channel up again.
  11. Cure the bead.
  12. After it is cured and cooled, sand it a little to get the roughness off the surface. 
  13. If you want to make the edges of the bead smooth instead of sharp, sand all the edges and corners to give the bead a worn feel.
  14. Use a tiny bit of white acrylic or oil paint to cover the surface very lightly, then wipe most of it off with a very level, light touch. My stamps have fairly shallow impressions so too much paint will overwhelm it and using a hard touch when wiping the paint will probably remove it all. 
  15. After the paint dries, sand the bead again to get any remaining paint off of the high surfaces.

You can also use copper metallic clay and paint it with a mix of turquoise and white to look like copper patina. Two samples are in the photo at top.


There are some of my stamps available in my etsy shop. Just go to etsy and type in Artybecca to find it.

I get my stamps made by www.readystamps.com because I can squeeze a bunch of designs on a 7" x 9" area and then cut them apart.

There are also stamp makers on etsy who will turn your design into a stamp. I have not used them so I can't vouch for any in particular.

Sunday, October 1, 2017

Easy and affordable framing recommendation

Photographers and artists -- easy and affordable framing recommendation here...
If you took a photo you really love and want to make a gift of it to family or friend, an easy way is with www.americanframe.com. Upload your high-resolution photo, choose frame and mat(s) and they will put it together for you and ship it off to your recipient. You can choose your paper -- I like the pearl finish. It really makes colors pop.
The framing uses a high quality acrylic instead of glass. You can't tell the difference and there's no worry about breakage. (Note: don't use window cleaner on acrylic; a barely damp cloth is all you need.)
Choose an "Econo" frame if you want to keep the cost really affordable. Costs are usually half or less than what you might pay at Michaels. My house walls are covered with 20+ of my framed artworks that were done at American Frame (some are originals, some are high-quality scans). You can save even more money if you buy metal frames and put them together yourself at home; it's super easy!

ABOUT THE PHOTO BELOW...
My cousin Sarah took this absolutely magical little scene of her children at the park. I think it could be an illustration for a childrens' book. 
I cropped out the top and bottom a bit and a little off the left side to push the kids slightly off-center and create a stronger focal point. I love the way the water turns into the sky at top right and how the tree is reflected in the water so you get a sense of the space even though you can't see it all. Plus the pose really captures the kids' personalities -- the adventurous girl always dives into life and her little brother is a bit more cautious.
I thought it was worthy of proper framing so I asked for the original file (downloads from Facebook are probably not good enough) and she got it just a few days later.

Saturday, June 10, 2017

Photo Fishing


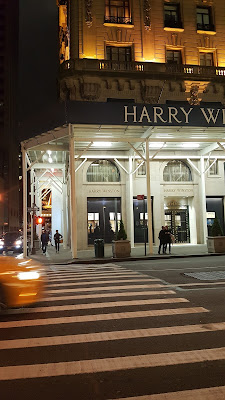
As I have mentioned a few times before, I love walking along downtown streets, taking pictures as I go. I might take 200-300 shots in an hour or so. Then I sit in a comfy chair and look through my shots to see what goodies I caught. My favorite subject matter is store windows -- day or night -- because you can see the inside and outside world at the same time.

I was just in Manhattan for a business trip and had several opportunities to snap photos as we walked to dinners and around the hotel on the last morning in town.

Below are some examples of how there can be hidden gems in your pictures. "Zoom in and crop" is how you can take a picture from ho-hum to hmmm!

Each set of pictures shows the original and then the cropped version I made. In some cases I also used Photoshop to boost the color or add a filter.

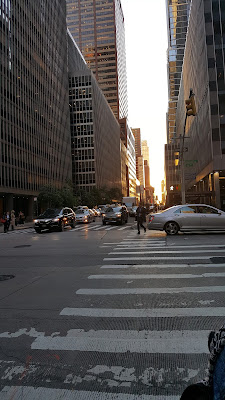
A random street turns into...


...a story about people and cars in close spaces
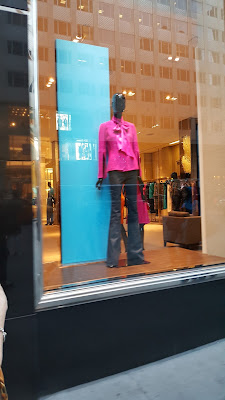
A nice pink jacket, but nothing to see here, right?...

...look at the almost abstract hiding in the lower left corner.
I used a filter but can't remember which one -- maybe Paint Daubs.


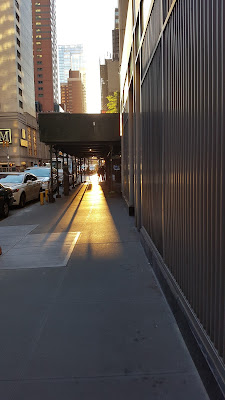
I liked the strong sunlight framing the couple who had been walking in front of me so I snapped a series
and liked the pose below that turned up in one of the shots.


Waiting for the right people to walk into the scene can make a difference.


I snapped a series of about six images as we crossed the street and ...
 
...found this comparison of two relationships in one of them!
 
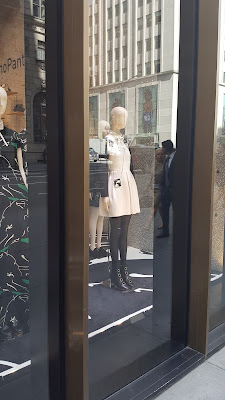
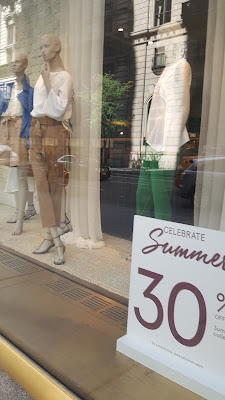
The solid color clothing doesn't distract from outside scene reflections so you can often get nice details.
 
I cropped the top half of the photo. I boosted the saturation and used the Poster Edges filter in Photoshop.
 
another view. I used the Cutout filter in Photoshop on this one.
 
Occasionally I find my way into a photo...


Monday, January 16, 2017

Embossing Powders on Polymer Clay


Update 8/17/28:
 :(  The embossing powder on clay doesn't hold up over the long run. It gets gummy and un-shiny.  If your need for super glossy only has to last a short while, go ahead and try it.
----
A few weeks ago I bought a heat gun and then last week I saw a video on Instagram in which gold embossing powder was used on calligraphy. These two unrelated events caused two more things to happen: I thought, "Hey! I can use embossing powders because now I have a heat gun." And I headed off Michael's to get some embossing powders.

At first I just got gold and white, and a mixed sample kit of black and silver, along with two Perfect Pearls glue pens (brush and bullets points), and an adhesive applicator with a sponge top.

My initial thought about the embossing powder was, "Yay! Finally, there's a way a way to make bold, opaque metallic lines on a bead. (And, also, now I want to learn modern calligraphy!)

So the first experiments were these:


But then, two more things happened:
1. As I heated the bead while it was mounted on a skewer, I saw the similarity to flameworking.
2. Now that I knew the powders were functioning as I had hoped, I bought more powders: sparkly gold, white, black, bronze, sparkly black, silver, clear, and chunky gold.

I pulled some not-so-good beads out of my stash and used the embossing powders as faux flameworking, though I think the finished products look more like ceramics than glass.

HOW TO:
I put a cured bead on a skewer. The bead had been made on a skewer so the hole was tight enough that the bead didn't slide up and down and then I went to town...

The original bead was mostly turquoise with some gold and yellow on it. I very, very lightly coated the bead with the Perfect Pearls adhesive in a sponge top applicator. I sprinkled a tiny bit of scrap powder all over the bead and hit it with the heat gun on the lower speed.
I have a Black & Decker heat gun with two speeds. The lower speed doesn't blow the powder off if you hold it at a distance and only move closer when the powder starts to melt.

After the first layer of powder is on, you no longer need the glue. If you turn the skewer while heating the bead the surface will be warm enough to make the powder stick.

Next I sprinkled on some white. I sprinkle the powder directly from the container. Put a piece of paper below where you're working to catch any excess and put it back into the container.
Or, if that's too much trouble, dump all your powder "scraps" into one container and use it as the base for your next beads.


More gold.
Sometimes I put layers of clear between the opaque layers to give the illusion of depth.


...and chunky gold...


If you keep the heat in one spot, the powder will begin to break up (a little bit is good but don't over-do it -- the melted powder will flow if you're not careful.)

Keep the bead on the stick a while to let it cool off. But if you get impatient and you touch it while it's still warm and leave a fingerprint, no worries! Just hit it with the heat again and the fingerprint will melt right out.
If you get a few bubbles from air trapped between the layers, wait until the bead cools a little, pat the bubble with your finger, and then melt the fingerprint.

CLEAR EMBOSSING
In the example below I didn't want to cover up the pretty colors underneath so I put the adhesive on the bead and sprinkled it only with clear powder and the chunky gold bits which I had mixed together.


I made a video to show the basic process. You can't see detail but you'll get the idea.
(If you can't view it on your phone, view it on a laptop. I don't know why, but the video that was shot and edited on my phone, cannot now be viewed on my phone when I try to launch it from the blog. Go figure.)


I tested the beads to see how well the finish holds up. I threw the clear one above 
 10 times and there's not a scratch or crack on it. See the video...